Cray-Flower – DIY Felt Mayflower Coloring Station Even the adults will be fighting for a place at the kids table when you add this fun rolling color station to your Thanksgiving festivities. This ship is a fun Thanksgiving craft they will be thrilled to play with all year round.
Passing crayons back and forth might prove to be more fun than the coloring.
You will need;
The Spirit of Adventure (required)
1 yard Dark Brown Felt I used Chocolate*
12″ x 5″ felt scrap in pale blue I used Ice*
I really doubt acrylic felt has the strength to complete this project I used a high quality wool rayon blend.
1/4″ dowel cut into 2 pieces (10″ and 8″)
4 – 2″ wood wheels
Acrylic Paint to match felt
Crayons (a 96 pack does a good job of filling the boat)
Paper
Scotch Tape (to connect templates)
Boat Pattern (at the end of post)
Felt Glue (Optional)
Cardboard scrap to fit boat bottom – you can also add some to the ships sides if you’d like to make them more sturdy but the doubled up felt will work fine.
*Matching thread

This Felt Thanksgiving Mayflower ship also makes one heck of a pirate boat.
Cut the wave pattern from blue felt and the remaining pieces from brown felt – save some scraps to help attach the trolley later.
Lets begin with the wave wheels since they will need to dry.
 Paint wave design onto wheel as shown on templates.

Repeat with all wheels. Paint dowels if desired and set aside to dry.
You don’t need to assemble the wheels yet.
Sew the two boat backs (marked on template) together using an overcast stitch and brown thread. Do not add cardboard to this piece since you will need it to curve. Set aside.
Sew shelf pieces together along the sides with an overcast stitch. Set aside.

Add waves with matching thread to opposite sides of boat as shown. The curve of the wave should point in the direction of the rounded boat front.
Sew second plain boat side to each side. You can place a piece of cardboard cut slightly smaller than the side template into the sides if desired but the boat will hold up just fine without it.
 Match sides up with waves facing outward and plain sides inward. Stitch rounded part of fronts together with an overcast stitch, stop when you get to the flat bottom.

Cut a boat bottom slightly smaller than the template from cardboard.
Sew two boat bottom pieces together with an overcast stitch and fill with cardboard for added stability.
Sew ship bottom closed.

Bend sides around boat bottom and overcast stitch to base with brown thread.
 Continue until both sides are sewn down to bottom.

Your felt Mayflower boat should look like this. (But less blurry unless you need glasses)
Bend back piece around the open space in the back of the boat and overcast stitch from the top to the boat base.

You’re almost done!

Fit shelf into felt Mayflower (or rather Crayflower) back. Attach with a few stitches along each side or felt glue into place.

Now that we have finished our felt ship, let’s make it roll!
Use scrap felt to stitch a 2″ wide rectangle slightly shorter than each of your axles to boat bottom .

Sew down along the long sides. The rectangle should lay flat.
Slip axle through and fit wheels onto both ends. You can further secure these with glue if desired but they should fit on pretty tightly.

The wheels will spin inside their felt shaft making your Mayflower mobile.
LOOK OUT PLYMOUTH ROCK!
Cut some of the paper into 5 x 7 pieces to fit into the top shelf.
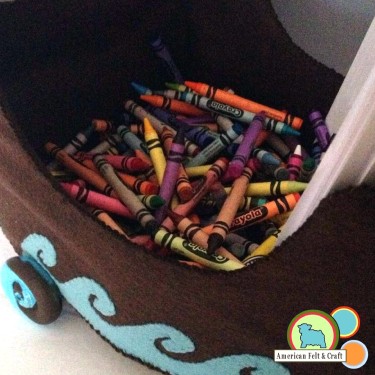
Fill with crayons and inhale that sweet new crayon smell.
Add full size printer paper to the ship to create ships larger sail.

Felt Mayflower Pattern PDF
Happy Thanksgiving and Happy Crafting!
Andie

More free Thanksgiving felt craft patterns because we love you:
 Easy Felt Napkin Rings

Fall Felt Garland
Shop for felt online

Tags: american felt and craft, autumn, craft, fall, felt, how to, instructions, Kids Table, mayflower, pattern, Pilgrims, pull toy, ship pattern, thanksgiving, Thanksgiving craft, Toy Trolley, tutorial


