Tag Archives: beads

The super easy 10 minute Cherry on Top Cupcake Hat!

3 Jan

When I spotted my daughters pink knit hat the other day I knew I had to stop everything and fancify it.

10 minutes later I had this awesome cupcake hat.

You will need:

  • 1 knit hat (the dollar section of Target’s version seen here)
  • Matching thread
  • American Felt and Craft Sprinkle beads (or beads of various color)
  • Beading or thin needle.
  • cherry, wool ball, or pom pom

The knit hat used was double thickness so I was careful to only sew through one of the thicknesses.

The trick here is to sew as few knit stitches as possible so the beads won’t be stretched with the hat.

Arrow points to tacking stitch knot

Begin by threading your beading needle and sewing a tacking stitch to 2 or 3 of the knit stitches, you can hide the knot by positioning the bead over it .

Tack down the opposite side. Since the second layer of knit takes most of the stretching the beads stay put without affecting the fit. Repeat until your happy with the look.

Tack cherry to the top by sewing through the base of the cherry and back through the bottom of the hat since the cherry is placed in the center you can go through both thickesses to help it sit upright without affecting the fit.

And there you are with an awesome hat!

25 days of Felt Christmas Crafts Day 21 Fabulous Felt Garland

19 Dec

Felt crafts for Christmas

You know the Shtick…25 days 25 felt Christmas crafts and away we go!

Remember Day 13’s  felt ball wreath from Tenniswood Blog ?

Behold it’s super cute cousin from out of town:

This adorable felt ball garland tutorial by My Sparkle also features a fabulously shot tutorial on making felt balls from scratch!

You will need:

  • Embrodery thread and needle
  • Around 70  felt balls you can make these yourself pretty inexpensively with roving using the same technique used to make felt jelly beans or just check out the excellent tutorial from My Sparkle.
(all photos via My Sparkle)

Missed some of the 25 days and want to start from day one?

https://americanfeltandcraft.wordpress.com/2011/11/29/25-days-of-felt-christmas-crafts/

Something To be Thankful For!

29 Oct

cover

You too can make this adorable Thanksgiving garland for your get together this year. It’s a great family project!*
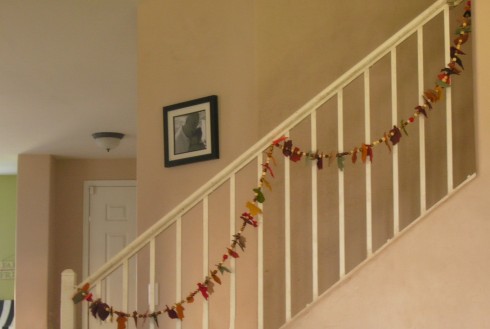
garland

Time to complete: 1.5 hour or less depending on your garlands size and number of helpers.

*Time to complete if one of your helpers is a 3 year old who thinks she may have swallowed a wooden bead and it is stuck in her throat so you have to go to the ER during Swine Flu season: 7.5 hours

garlandsupply

Supplies:

1 large container of wooden beads

1 skein of good quality yarn or twine

Felt in various fall colors I used, Monkey, Oatmeal, Gingerbread, Sweet Potato, Alburn, Mud Puddle, Cilantro, Red Rock, Gold Nugget, Chocolate Moose and Red Wagon

6 felt balls in Valentine (opt, if you use felt balls you will need a large needle to string them)

A wide eyed needle (opt but helps move things along much faster)

Your insurance card (opt)

Directions to the nearest ER (opt)

Your pediatrician’s phone number (opt)

A full tank of gas (opt)

A great excuse for the cops  (opt.)

First you will need to cut your leaves out of various colors of felt. The number you will need depends on the look you are going for and how long your garland will be. Here are the leaf templates I used:

Project1

After cutting out the desired number of leaves begin the stringing process by creating a loop for hanging and creating a series of knots large enough to keep the beads from sliding off.  When making this project with multiple children you may want to make a few smaller strings and tie them together when they are complete.
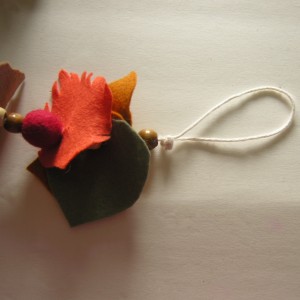
garlandloop

 You can then begin the stringing process by adding a few beads followed by leaves and an occasional felt ball for color be sure to clip a small slit in the leaves so that they string easily. Repeat stringing process creating another loop at the end to easily hang.
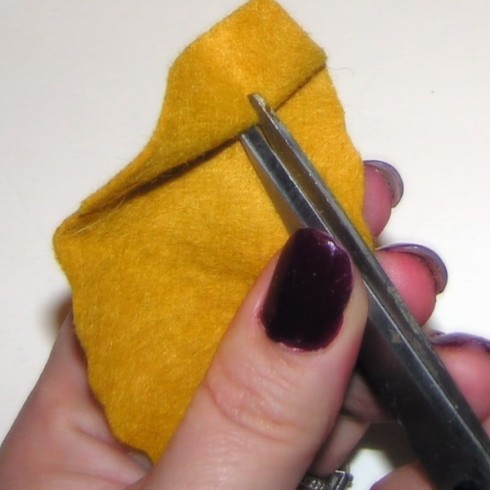
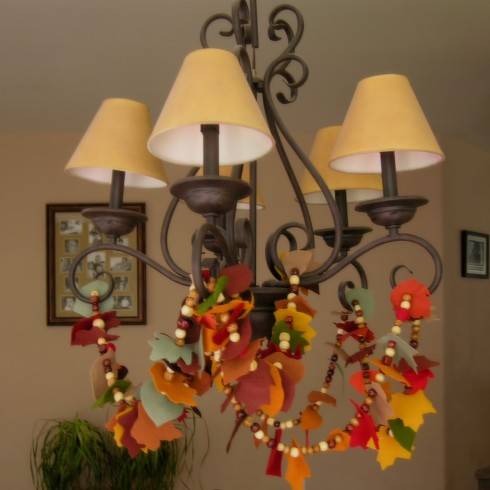
garlandslit


fallfeltgarlandlamp


* Please note this is where the instructions end and my harrowing journey begins read on…if you dare!

On a lovely fall evening I sat down with my brood to start the fall garland project I have been meaning to begin for about a month now, having already cut out my fall leaves we were ready to stringing. Normally one might assume this to be  a quick and fun family project, however my older boys quickly got into a fight and disappeared presumably to find their light sabers and finish each other off. So my darling daughter and I continued to string and talk (mainly about princess movies).

My adorable daughter’s throat must have been getting dry from the amount of talking only three-year old girls and micromachine men can sustain so she said she was going to go drink her juice in the kitchen.

deadlybeads

I then heard the universal mom equivalent to the nuclear button being pushed CHOKING…ok ok so it was more of a slight coughing… but come on she’s the only one in this house who shares my adoration for eyeshadow so I tend to panic easily. I fly into the kitchen with my superhuman mom speed to rival that of  a True Blood vampire, to find my daughter calmly sipping her juice. “Are you OK?” I ask she says yes and we head back to the family room and proceed with the stringing.

anatomy lesson

Then my beautiful blue-eyed daughter looks over at me and makes little throat clearing noises. I ask again if she is ok and she replies, “Yeah I just have bead stuck in my throat and I can’t get it out…” “WHAT?” THIS IS CODE RED! THIS IS NOT A TEST REPEAT  THIS IS NOT A TEST!!!…What do I do…I look, she’s not blue at all..so I lift her shirt (ok so I realize this maneuver will give me not actual usable information but hey at least I was pro-active) seeing nothing abnormal I then look back up at her face and I notice she is a little blue mainly around the eyes and a little…sparkley?? I then realize that I am looking at the aforementioned eyeshadow.

So what do I do? I think about attempting the hymlic manuever but I am not sure I can remember it…then visions of my arms around her chest and the bead popping slowly out of her throat only to land further in completely wedging itself and cutting off her air supply irrevocably nearly make me have a stroke…besides she can still breathe I don’t want that to change. I think about calling 911  but then decide that “bead stuck in my daughters throat” might not be taken for the kind of life threatening emergency I am now positive this is…AHH HA I will call my AFC business partner a registered nurse and she will be able to tell me some magic nurse voo doo which will remove the bead causing no harm to either my baby girls windpipe or my psyche. She doesn’t answer, turns out she is working at the ICU that night, probably nursing sick little ones who swallowed beads because their negligent mothers sent them in to the big kitchen unsupervised thus allowing them to enter a life threatening situation…tisk tisk. I tell her to sit very still in her chair positive that even the slightest jostling will cause her to lose conciousness.

I call the pediatrician and am asked a series of ridiculous questions like, what is her date of birth, and what is a phone number the doc on call can reach you at…DON’T THEY GET THIS IS AN EMERGENCY??? I wait for a return call and figure we will need to rush her to the ER… my cave girl gathering instincts kick in I gather one of every different kind of bead we have been using and a few leaves, cause you never know maybe one of those is in there too, some books and insurance information, a bottle of water, and extra pair of socks…I am debating on bringing blankets and my laptop when the phone rings…10 minutes what kind of service is that she could have died waiting!?

emergency_3

The frighteningly calm almost the point of being bored by my plight doc asks me how big the beads are I tell her they are smaller than a grape but bigger than a pea, kind of like an olive the klamata kind not the black kind but round and some have ridges I am just about the tell her the wood composition when she stops me and tells me just to go to the ER.    I knew it! This is an emergency! I tell my 13 year old he is in charge of his brother until dad gets home in 20 minutes, hoping another intergalactic battle doesn’t break out. I then remember my cars tags have expired… too bad I’ll have to break the law to save my daughters life! I plan my succinct version of events to share with the cops should it become necessary as I carefully put her little UGGS over her tights sure that the choking will begin in earnest any minute and load her into my illegal crime mobile. We drive to the nearest ER. with the gas light on the whole way. I try to get her to talk all the way there to ensure that she can still breathe, apparently having grown tired of mommies freak out she tells me she just wants to rest because she is tired. NO NO NO I scream…in her defense it is 8:00 and she missed her nap that day but to me this is a further sign of her slip towards the white light. I think about getting her to sing but I am sure that this will in fact force into her airway more (especially the way my little broadway star can belt them out) and once again the image of the bead lodging itself in her tiny trachea makes me feel like I am the one with beads in my throat.

We arrive at the packed ER and fill out our form while I try not to yell out various words I have heard on ER (like STAT, CODE BLUE, and CBC BLOOD CHEM) to get my daughter more attention in her obviously life threatening situation.

candle

The rest of the night involved a long wait followed by series of X-rays where I valiantly risked exposure to radio waves to save the life of my only daughter followed by an even longer wait dealing with the girl in the curtain next to me tell the doc she is having a panic attack (She probably heard my story and is panicking at the mere thought) reading princess story books, using the restrooms touching as few swine flu infected surfaces and my balance and their supply of paper towels would allow… more waiting.

Finally a doctor with the creepiest blue eyes I have ever seen (I think he may have been some kind of supernatural creature that can only work nights) arrives to tell us that “things don’t actually get stuck in windpipes and allow a person to still breathe…and the esophagus is amazing lined with muscles  which move swallowed things into the stomach…blah blah blah… should pass on it’s own…only should have worried if she was vomiting, losing conciousness blah blah blah..to big to go into a lung….blah blah blah free to go.” At this point I feel as though I may lose consciousness and vomit.
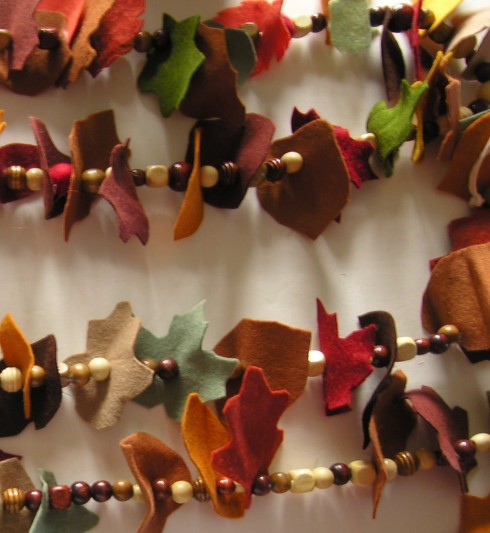
fallfeltgarland

We arrive home and my business partner calls and says “That’s no big deal…things don’t actually get stuck in windpipes if a person can still breathe, really the esophagus is an amazing thing…” Her cavalier attitude towards what I am still not entirely certain wasn’t a near death experience forces me to tell her I have to go.

We’re giving our garland away…or maybe bronzing it.

Felt food 101- How to make Felt Food lesson 5 Stuff it!

29 Jun

felt food how to fall veggies

A little backround,

3 years ago I was put on bed rest during a pregnancy it was also around this time that I spent my daughters college fund on a beautiful pink retro kitchen set, I think you know which one I am talking about, you know the one everyone passes and says, “who would pay that!?” well I did, anyway for Christmas that year along with her lovely kitchen she received some wooden play foods, which being very little she promptly used to scratch and dent her wonderful kitchen…needless to say those little suckers were gracing the shelves of goodwill by weeks end!

But what can you do in a play kitchen without play food, and I wasn’t about to bring a bunch of plastic junk into my home, then the solution presented itself in the form of felt food. I have now made everything from soup to nuts, literally. After crafting felt food for sometime I began to get frustrated trying to find the bits and pieces of everything I needed to do what I wanted to, so together I decided to create the store I was looking for, American Felt and Craft. Please stop in sometime and take a look around. And as always if you have any questions I am just an email away and I’m happy to share my knowledge and a few of my favorite patterns with you!

Stuff it

DSCN7605

Natural Wool and Synthetic Polyester Stuffing

In this the last installment of Felt Food 101 I’ll be convering the subject of stuffing your creations.

If you just doing some bare bones construction all you will need is stuffing any kind from any place, I have even been known to head to tag sales for stuffed animals to butcher for this exact purpose, the bonus to this is that your saving a huge, and generally ugly stuffed animal from rotting in a landfill, this is especially important because fiberfill is a plastic.  While it does eventually break down it’s chemical components soak into the ground and can get into the ground water so any you can salvage for a higher purpose is great.  I usually buy my giant stuffies for about 2 bucks sometimes less. I send them through the wash with bleach two times and then they are ready to go. However with the advent of bed bug outbreaks all over the country I’d hold off on this technique unless you know the stuffie.

If your stuffie is too big for your machine unstuff it and place stuffing into pillow cases knot at the top and run through the washer. Please be forewarned if you’re not careful one of your children will inevitably fall in love with said animal it will grace your living room for the next few years! SO HIDE YOUR STOCK IN THE GARAGE!!!

Of course you can always buy your stuffing. If your buying fiberfill I would recommend going with a mid-range to high priced bag the cheapest stuff has very short fibers which fly everywhere and are really irritating to your nose, eyes and lungs, and I hate the thought of that stuff creeping out into little lungs. You may also want to beware buying the super cheap stuff  often marketed as premium quality fiberfill, it’s grayish in color, I have heard of peoples’ projects becoming permanently stained by this stuff, since the blueish strands are apparently not color fast.

Your other last stuffing option is wool. I have begun stuffing with wool and it is so much nicer and really not much more expensive than the plastic fiberfill stuff.  And because wool has antibacterial and antimicrobial properties I feel better about giving it to my kids. You can buy wool stuffing at our store. Or through various local and online vendors. Another thing I have noticed about wool is that is seems to have a much larger loft than plastic stuffing so you get more puff for your buck.

When using stuffing to make felt food there is one golden rule it is always better to under stuff than to over stuff. over stuffing results in bulges and puts alot of stress on your seams. Over stuffing also results in hard felt food which isn’t nearly as love able.

Alternative methods

If you’re getting really into the whole felt food thing you’ll soon learn that there are many applications where plain old stuffing just won’t do, and you may want to invest into different stuffing methods like foam and batting.

Wool and polyester batting

Wool and polyester batting

Batting stuffs just like stuffing only it  lays flat  and stays that way so it’s perfect for making flat low items like pizzas, cookies, and slices of bread. You use it just like stuffing only you cut out the size and shape piece you need and slip it into your piece before closing it up. Batting is also available in wool and polyester. Wool is preferable for appearance , loft and ecological reasons. I find with synthetic batting I usually have to cut to or three of my filling shape versus 1 in the wool. You won’t need much batting since a little goes a really long way. Batting is usually sold in lengths and widths matching standard mattress sizes since it is used to make quilts. If you plan on only making felt food a crib size batting will be more than enough.

Foam round for cakes sold at American Felt and Craft

Foam round for cakes sold at American Felt and Craft

Foam fits in where batting leaves off it’s great for flat high things which are sometimes hard to get to hold a shape like cakes, tarts, pies, sticks of butter etc etc…  The taller the item the more likely it is to be distorted when stuffed with regular stuffing. By foam I mean foam rubber the kind used to make chair pads and dog beds not Styrofoam which is entirely different and should never be used to make felt foods.

When using foam you can either buy pre-cut shapes or buy foam  by the yard and cut it to shape.  The thicker the foam the more expensive it is.

I find that you want no more than 3 inches tall for cakes,  2 inches or less for pies and  ½ inch or less for bread slices, although when you are working with something thin batting should work as well or better than foam.  If you can’t find the size you want you can attempt to glue to foam rounds together to achieve more height this is much harder to do than you would think, in order to accomplish you will need to acquire foam and fabric adhesive,  this is a spray glue sold at upholstery shops and at some hardware stores. If you attempt to glue the foam any other way it will melt, shift or break apart under stress. I would recommend using stuffing before I would recommend gluing foam. We sell pre-cut foam rounds in many sizes and shapes for your felt food projects, all of our foam is pre-cut as well as being fire retardant.

Selection of foam rounds from American Felt and Craft.

Selection of foam rounds from American Felt and Craft.

Should you decide to cut your own you may be asking yourself how the heck you’re going to cut the foam. If your foam is very thin you may be able to use scissors otherwise you will need an electrical carving knife so it’s worth it to buy a good one. PLEASE PLEASE DO NOT ATTEMPT TO USE A HOT FOAM CUTTING WIRE, these are used to cut Styrofoam which heats and cools quickly if you attempt to cut a foam pad with this it will create a black smoke which is dangerous to breathe in and may cause the foam to melt and adhere to your skin causing terrible burns!! Please note your cuts do not have to be completely even or perfect when covered with felt lumps, bumps and unevenness tend to completely disappear.

For more on cutting foam check out our Guide for cutting your own foam:

foam felt food tutorial

https://americanfeltandcraft.wordpress.com/wp-admin/post.php?post=1845&action=edit

Hold it down in there

You might also want to add a bit of rice, un-popped popcorn kernels, doll beads, or beans to the bottom of some of your felt food it will help it to stand nicely. The food items can get a little questionable over time so if your in this for posterity I would use doll beads.

Adding something

Depending on the age of the kids your making the felt food for you may want to consider placing a rattle or squeaker inside your felt food. American Felt and Craft sells rattle inserts in 2 sizes, jingle ball inserts and squeaker inserts in 3 sizes. When making felt food for a family with children in multiple age ranges this is especially nice since the smaller ones will get just as much enjoyment from them as older more culinary minded siblings.

Jingle bell ball crafting Make a baby rattle


Previously: Putting it all together