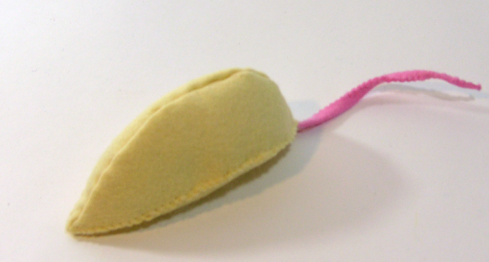
When in the course of a royal girlhood many would- be -Cinderella’s may find themselves in need of mousy assistance. Fear not, this situation is easily remedied with the most magically of all fabrics…felt.
With the addition of some cat nip, a jingle ball, squeaker, or toy rattle insert, you can magically transform your cat’s day too!
For this project you will need
1 9x 12 sheet of felt in mouse color of choice I used Buttercream, Peacock, and Flamingo.
(scraps of felt may be used for the tail and ears from a contrasting color)
Matching thread
(Optional details: Small black eye shaped beads, cross stitching thread for whiskers, small button for nose.
Scraps of felt can also be used if your mouse is going to be used as a pet toy and safety is a concern)
Stuffing
Basic sewing supplies
(optional fillers: Medium Squeaker, Rattle maker insert, Jingle Ball, Catnip)
How to make a felt mouse:
Cut out pieces as directed on template and set aside, fold tail piece over onto itself and overcast stitch to opposing side, this can be a bit tricky at first. Set aside when complete.
Create the mouse’s ears by folding ear template and overcast stitching the slit area closed with matching thread. Set ears aside.
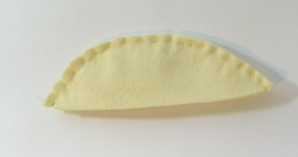
Place both sides of the mouse body together and stitch along top with a running stitch and matching thread.
 Attach tail to the back of the mouse body (the rounded end) while it is still inside out.
Turn right side out stuff lightly add noisemaker if desired and attach bottom of mouse using coordinating thread and an overcast stitch.
If your concerned about your mouse being a bit off center cut a second mouse bottom from thin cardstock and slip in place between the stuffing and felt bottom before overcast stitching closed.
Attach ears to the mouse side, knots can stitches can be easily hidden behind the ears.
 Attach eyes to the felt mouse by moving needle through the mouse face entering from behind the ears, after eyes are securely attached the needle should be brought through the face and out through the tip of the nose, attach button nose and hide knot under the button.
 Attach a few whiskers to your mouse, here I used 4 strand cross stitching thread, it was a little too thick for the look I wanted.
Here I used multiple layers of standard thread. To attach I went into one side and created a knot to hold the whiskers to the length I wanted and pulled through once through I created a knot on the other end to hold it into place and trimmed off any excess thread. This will create a knot on the face but is by far the most secure way of attaching the whiskers.
If you decide not to use the eye beads and button nose simply cut out these pieces from scrap felt and sew into place.


Lovely ideas to make for kid. i like it, thanks