It’s easy to sew up some glow in the dark “floating” jellyfish. These little jellies would look adorable hanging from a mobile, swimming in the playroom or even hanging from a Christmas tree.
 But when the lights go out the real magic happens. Crafting these DIY felt jellyfish from glow in the dark felt means that once these guys get a good charge from either natural or artificial light they will glow softly.
  All that cute and no sting!
Read on to learn how to craft up a sea full of jellyfish buddies. 
You will need:
Glow in the dark felt, I used pink, green and blue *
Embroidery thread in white and black
Sequins: I used Highlighter, Pinkalicious, and Seafoam
1 yard cording I used White teething cord
4- 8″ ribbon(s) I used gold and another coordinating color
Stuffing
*Matching thread

Cut:
One jellyfish body base and ruffle from glow in the dark felt.
 Match up sides of small V shapes at the base of your jelly fish and overcast sew them together.
  Repeat with all small V’s
 Repeat with the larger V shapes stitching up the sides last.
Turn the shape so it is inside out.

Stuff and overcast stitch the base to the jelly fish body with an overcast stitch and matching thread.
 Run a loose stitch up the ruffle and pull until it measures 5.5″ long
Overcast stitch the ruffle along the base of the jellyfish body
 Stitch face details with black cross stitch thread. Add freckles at the cheeks and on random parts of the body with french knots and white thread. Create a loop at the top to hang with the white thread. Hide the knots under the ruffle at the base.
  Add sequins, for tips on attaching sequins see this post.
  Set aside.
Loop cording in different size loops and tie with ribbon(s). Trim loops so cording hangs at different lengths. Hold top together and loop cording around the top and tie to create a tassel for the base. Wrap the hanging cording around your finger to shape.  Stitch through and around tassel and into the base of the felt jellyfish body.

 Happy Crafting
~Andie
You might also like

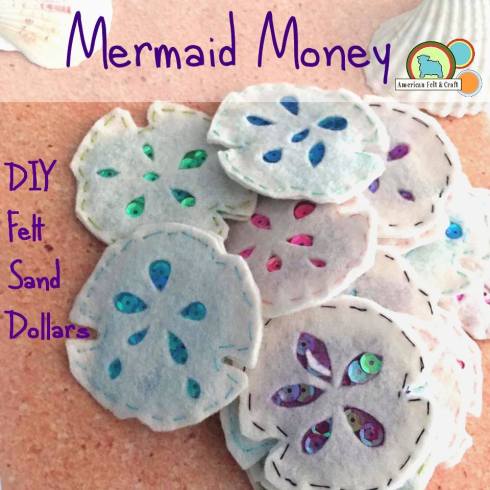


 These make fun projects for little ones to decorate. Use felt glue or a glue gun to decorate with sequins, small beads and or cutout shapes, dry and assemble as above.


 “It’s a lovely day in the village, and you are a horrible goose.” That’s the simple description for this even simpler computer game where you’re a (horrible) goose, dead set on ruining the townspeople’s day with comic hi-jinks and lots and lots of honks. If that’s not worthy of an ornament I don’t know what is.
 If you are a fan or know someone who is it’s easy create your own felt Untitled Goose ornament complete with honk.
 HONK HONK HONK
 Stitch trail to one of the green circles with a running stitch and matching thread.
 Temporarily place goose shape to figure out feet and beak placement and applique stitch orange pieces down with matching thread.
 Attach goose body with an applique stitch and add eye with a single strand of black embroidery thread.
  Overcast stitch the circles together with an overcast stitch and matching thread. When you reach the top fold loop in half and sew into place. Stuff circles with squeaker before closing.


 Stitch collar along top of the robe with a running stitch and matching thread, set aside.
 Fold arms and stitch long sides together with matching thread and an overcast stitch.
  To make Baby Yoda’s hands. Attach hands inside of sleeves with a drop of felt glue or some small running stitches stitches. You want the fingers to just peek out of the sleeves. Set aside.
 Place body pieces together and overcast stitch around the outside using matching thread stuff before closing.
  Wrap robe loosely around body until you are happy with the look, it should swing away from the body to look like it’s over sized not fit tightly. We want our DIY Baby Yoda to be comfortable enough to nap and chase frogs.
 Attach arms to the shoulders of the robe with a running stitch or two and matching thread. The felt fur is very forgiving so stitches are easy to hide making the arms super easy to attach.
  Attach Baby Yoda’s foot with felt glue, you can add another if you like but I preferred the look of one little Yoda foot sticking out of the over sized robe. Set aside to dry.
 Mark face detail page and cut holes for plastic eyes if you are using them. Cut holes for eyes in one of the head pieces too so they go through without issues.
 Add eyes
  Attach remaining head piece back to the decorated face and overcast stitch closed with matching thread. Stuff lightly before closing.
 Place the finished head in front of the neck at an angle and attach with a few running stitches.
  And viola, you’ve got yourself a Baby Yoda toy you’ve made by hand! Good job you!
 You can also attach a ribbon or loop and Baby Yoda would make a great felt Christmas ornament or addition to Star Wars themed gift wrap.