A little backround,
3 years ago I was put on bed rest during a pregnancy it was also around this time that I spent my daughters college fund on a beautiful pink retro kitchen set, I think you know which one I am talking about, you know the one everyone passes and says, “who would pay that!?” well I did, anyway for Christmas that year along with her lovely kitchen she received some wooden play foods, which being very little she promptly used to scratch and dent her wonderful kitchen…needless to say those little suckers were gracing the shelves of goodwill by weeks end!
But what can you do in a play kitchen without play food, and I wasn’t about to bring a bunch of plastic junk into my home, then the solution presented itself in the form of felt food. I have now made everything from soup to nuts, literally. After crafting felt food for sometime I began to get frustrated trying to find the bits and pieces of everything I needed to do what I wanted to, so together I decided to create the store I was looking for, American Felt and Craft. Please stop in sometime and take a look around. And as always if you have any questions I am just an email away and I’m happy to share my knowledge and a few of my favorite patterns with you!
Stuff it

Natural Wool and Synthetic Polyester Stuffing
In this the last installment of Felt Food 101 I’ll be convering the subject of stuffing your creations.
If you just doing some bare bones construction all you will need is stuffing any kind from any place, I have even been known to head to tag sales for stuffed animals to butcher for this exact purpose, the bonus to this is that your saving a huge, and generally ugly stuffed animal from rotting in a landfill, this is especially important because fiberfill is a plastic. While it does eventually break down it’s chemical components soak into the ground and can get into the ground water so any you can salvage for a higher purpose is great. I usually buy my giant stuffies for about 2 bucks sometimes less. I send them through the wash with bleach two times and then they are ready to go. However with the advent of bed bug outbreaks all over the country I’d hold off on this technique unless you know the stuffie.
If your stuffie is too big for your machine unstuff it and place stuffing into pillow cases knot at the top and run through the washer. Please be forewarned if you’re not careful one of your children will inevitably fall in love with said animal it will grace your living room for the next few years! SO HIDE YOUR STOCK IN THE GARAGE!!!
Of course you can always buy your stuffing. If your buying fiberfill I would recommend going with a mid-range to high priced bag the cheapest stuff has very short fibers which fly everywhere and are really irritating to your nose, eyes and lungs, and I hate the thought of that stuff creeping out into little lungs. You may also want to beware buying the super cheap stuff often marketed as premium quality fiberfill, it’s grayish in color, I have heard of peoples’ projects becoming permanently stained by this stuff, since the blueish strands are apparently not color fast.
Your other last stuffing option is wool. I have begun stuffing with wool and it is so much nicer and really not much more expensive than the plastic fiberfill stuff. And because wool has antibacterial and antimicrobial properties I feel better about giving it to my kids. You can buy wool stuffing at our store. Or through various local and online vendors. Another thing I have noticed about wool is that is seems to have a much larger loft than plastic stuffing so you get more puff for your buck.
When using stuffing to make felt food there is one golden rule it is always better to under stuff than to over stuff. over stuffing results in bulges and puts alot of stress on your seams. Over stuffing also results in hard felt food which isn’t nearly as love able.
Alternative methods
If you’re getting really into the whole felt food thing you’ll soon learn that there are many applications where plain old stuffing just won’t do, and you may want to invest into different stuffing methods like foam and batting.

Wool and polyester batting
Batting stuffs just like stuffing only it lays flat and stays that way so it’s perfect for making flat low items like pizzas, cookies, and slices of bread. You use it just like stuffing only you cut out the size and shape piece you need and slip it into your piece before closing it up. Batting is also available in wool and polyester. Wool is preferable for appearance , loft and ecological reasons. I find with synthetic batting I usually have to cut to or three of my filling shape versus 1 in the wool. You won’t need much batting since a little goes a really long way. Batting is usually sold in lengths and widths matching standard mattress sizes since it is used to make quilts. If you plan on only making felt food a crib size batting will be more than enough.
Foam fits in where batting leaves off it’s great for flat high things which are sometimes hard to get to hold a shape like cakes, tarts, pies, sticks of butter etc etc… The taller the item the more likely it is to be distorted when stuffed with regular stuffing. By foam I mean foam rubber the kind used to make chair pads and dog beds not Styrofoam which is entirely different and should never be used to make felt foods.
When using foam you can either buy pre-cut shapes or buy foam by the yard and cut it to shape. The thicker the foam the more expensive it is.
I find that you want no more than 3 inches tall for cakes, 2 inches or less for pies and ½ inch or less for bread slices, although when you are working with something thin batting should work as well or better than foam. If you can’t find the size you want you can attempt to glue to foam rounds together to achieve more height this is much harder to do than you would think, in order to accomplish you will need to acquire foam and fabric adhesive, this is a spray glue sold at upholstery shops and at some hardware stores. If you attempt to glue the foam any other way it will melt, shift or break apart under stress. I would recommend using stuffing before I would recommend gluing foam. We sell pre-cut foam rounds in many sizes and shapes for your felt food projects, all of our foam is pre-cut as well as being fire retardant.

Selection of foam rounds from American Felt and Craft.
Should you decide to cut your own you may be asking yourself how the heck you’re going to cut the foam. If your foam is very thin you may be able to use scissors otherwise you will need an electrical carving knife so it’s worth it to buy a good one. PLEASE PLEASE DO NOT ATTEMPT TO USE A HOT FOAM CUTTING WIRE, these are used to cut Styrofoam which heats and cools quickly if you attempt to cut a foam pad with this it will create a black smoke which is dangerous to breathe in and may cause the foam to melt and adhere to your skin causing terrible burns!! Please note your cuts do not have to be completely even or perfect when covered with felt lumps, bumps and unevenness tend to completely disappear.
For more on cutting foam check out our Guide for cutting your own foam:
https://americanfeltandcraft.wordpress.com/wp-admin/post.php?post=1845&action=edit
Hold it down in there
You might also want to add a bit of rice, un-popped popcorn kernels, doll beads, or beans to the bottom of some of your felt food it will help it to stand nicely. The food items can get a little questionable over time so if your in this for posterity I would use doll beads.
Adding something
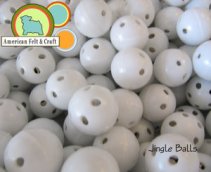
Depending on the age of the kids your making the felt food for you may want to consider placing a rattle or squeaker inside your felt food. American Felt and Craft sells rattle inserts in 2 sizes, jingle ball inserts and squeaker inserts in 3 sizes. When making felt food for a family with children in multiple age ranges this is especially nice since the smaller ones will get just as much enjoyment from them as older more culinary minded siblings.


Super article about stuffing. I also love to use the new eco-friendly stuffings made from corn fibers. It is very smooth and gives a lovely finish when I use it for my dolls. Thanks for all of this great info!
Ellen
Your story about your child’s kitchen playset sound just like the one I would like to create for my son. But, no, I’m not going to buy one, I am going to whip one up from cardboard kinda something like this only with a fridge too:
http://www.etsy.com/view_listing.php?listing_id=20081669
That’s why I adore felt and will be making felt food and play items based on a lot of your goodies that you show here.
THank you! We definitely are on the same brainwave, I think. Sometimes, though, I flatline.
Never thought of using foam before, great idea!
Really cool tutorial ! I love it I will start using felt in my designs!
Have a nice day
Great tips! I’ve been using polyfil but I hate that it is flammable. Maybe I’ll switch to wool after reading your description of it!
I know that this is an older post/blog entry … but I will ask here, just in case someone still reads it. Do you know if those thick foam pads sold as mattress pads (like the egg crate ones, but without the bumps) – memory foam or something – would work as well as upholstery foam? it would be much cheaper …
Thanks!
Mattress pads would work you could also try cutting a sponge of the right thickness, similar to the large ones used to wash cars.
very creative .. continue working and successful. 🙂
Thank you! Your dolls are beautiful.
Hey there! I’ve been following your blog for a while now and finally got the courage to go ahead and give you a shout out from Dallas Tx! Just wanted to tell you keep up the good work!
Just read this post–great information. One thing–I wouldn’t use the popcorn or beans in anything!! This may well eventually draw weevils that love this stuff and they will get into your pantry sooner or later.
Know this from experience!! Kept getting weevils and couldn’t figure where they were coming from. Finally discovered that a really cute fabric chicken I had in my kitchen was loaded with them along with the popcorn that had been used to weigh it down. Out it went and the weevils stopped!!
Best advice–stick with the filler beads!!
Great points Ruth! Thank you so much for the tip. 🙂