
 There has never been a better time to add to your pin cushion collection especially when the options are this cute! This smiling roe sushi is the perfect pin holder, it sits flat, holds a bunch of easy to grab pins and looks absolutely adorable. Best of all these step by step instructions make it easy for even a beginner to make.
 You will need:
9″ x 4″ scrap Seaweed colored felt (Sushi) *
6″ x 6″ White felt scrap (White)
2 – Sequins (Coral) *
2 – 6 mm doll eyes
Black embroidery thread
Long Pins (in a pinch you can remove the tops to flat flower pins an re purpose)
Round orange or red beads
Stuffing
Cardboard for base
Super Glue
*Matching Thread
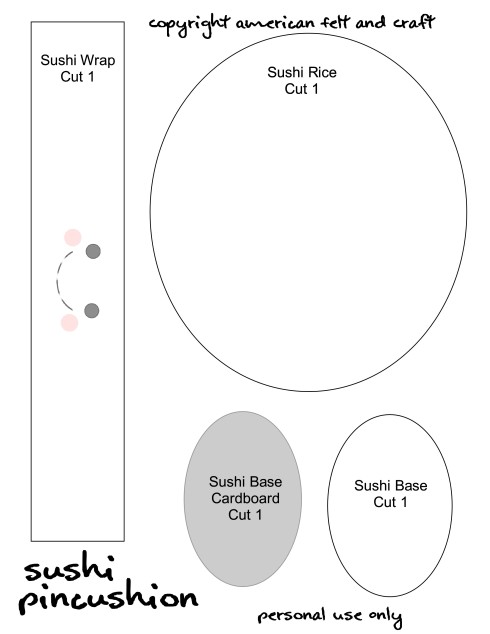
Cut:
1 Sushi wrap and 1 bottom from seaweed colored felt
1 Rice ball from white felt
1 Cardboard bottom


Glue beads to pin ends and allow them to dry upright for the amount of time recommended by the glue.
 Attach eyes to center of felt sushi wrap.
  Stitch sequins for cheeks to front. Sew a smile with black thread to complete face.
  Sew sushi wrap edge to the oval shaped base with overcast stitch and matching thread. The smile should be at the base and the eyes at the open end. Stitch up the short sides of the wrap to form a cup shape.
Add cardboard insert to prevent pins from coming through your felt sushi pincushion.

 Sew a large gathering stitch around outside of rice ball, pull.
Stuff lightly, pull closed and sew through several times to secure.  Place rice ball into sushi wrap and add pins.

Happy Crafting!
~ Andie


Leave a Reply