
Is there a mermaid in the house in need of a lift?
Have no fear American Felt and Craft is here with the perfect solution.
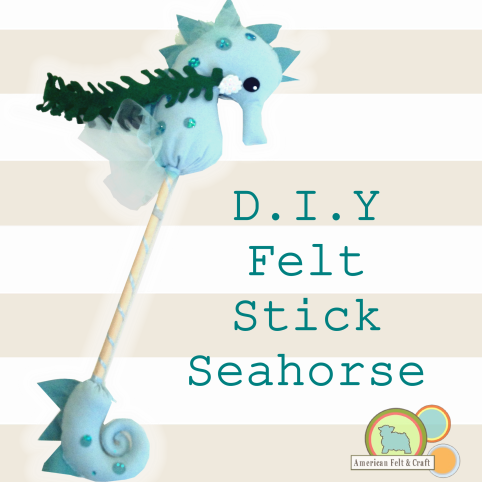
This adorable felt hobby horse is actually pretty easy to make and guaranteed to be loved by all weary mer-people in your underwater castle.
But first lets learn some fun facts about Seahorses*, shall we? Oh I think we shall…
*Seahorses (that’s correct plural form- yes, I looked it up) are actually fish.
Most *seahorses are monogamous and can be extremely romantic they “dance” and even “sing” to one another while courting.
Male *Seahorses carry the young. (That’s right ladies singing AND childcare)
*Seahorses are one of only two fish species that swim upright and are actually quite slow-moving.
*Seahorses are vulnerable to extinction for many reasons (mostly us) and need to be protected.
*Yeah I know it’s bothering me too but I swear it really is “seahorses”.
For more on these beautiful fish and to see some amazing pictures of *seahorses as well as ways to help I would encourage you to visit:
Project Seahorse
(I guess it’s just the one because as we’ve established the plural is seahorses)
Now on to our felt seahorse craft project:

You will Need:
1/2 yard Seahorse Body Color – I used Sparrow*
1 – 9″ x 12″ sheet Seahorse spot and back fin color – I used Ice*
Scrap Black* felt
1/8 yard green felt – I used Fresh Cut Grass*
4 x 5 scrap White felt*
Hook and Loop in color matching seahorse- I used Pool
Wooden Dowel The one I used was 5/8″ x 48″
1/ 4 yard matching Tulle netting
*matching thread
Sequins in Mermaid and Snow White
Hot glue gun and “ammo”
4 yards 3/4″ ribbon
Large eyed needle
Templates (in PDF at the end of this post)
Tape Seahorse templates together as shown:

Cut 2 tail pieces and 2 head pieces from main body felt color
Desired number of dots and 3 back fins from contrasting felt color.
1 – Kelp Bridle from green felt on a fold.
2 Eyes from black felt
4 Shell sides from white felt
Cut hook and loop into 2 – 1″ lengths – you will be trimming the loop (soft side) down more later.

Sew snow white sequins to black eye pieces and to 2 of the shell shapes as shown above.
On the opposite side of the second shell piece sew hook (rough side) of hook and loop.
Set aside these will be used for the detachable kelp bridle.
Add coordinating sequin details to felt dot shapes as desired.
For more on sewing Sequins to felt see our post on -well …sewing sequins to felt.
Fold tulle in half and cut. Set one half aside for the fin and cut the remaining piece in half again for the ear fins.

I totally made up that body part name – they are actually called pectoral fins but I think you’ll agree ear fins sounds at least 45% cuter.
Gather the tulle up along the long part and tie together with thread or thick string to hold.

Lay out details on one side of the seahorse head. Pin tied tulle piece under a dot.
Cut loop (soft) side of hook and loop into small ovals.

Pin one oval onto each side where the bridle will be attached.

Stitch details to each of the two sides.
Because of my deep love for you I ask that you please double check to make sure you are using mirroring sides.
Otherwise you may find yourself cursing like a sailor and no one wants that!

Pin 2 back fin pieces between the two detailed head pieces.
OK technically it’s a called the superior trunk ridge but we make our own rules around here so back fins it is!
Overcast stitch around the outside and around the “back fin” with a running stitch leaving the bottom open.

Stuff head piece and set aside.

At this point you should have a lovely and large felt seahorse head.
Mad at the pool guy or local aquarium? Consider placing this head in their beds for a warning that’s creepy – yet whimsical and also squeezably soft because we are after all a peaceful people and everyone needs a hug.
Sew details to both sides of tail piece and begin sewing around the loop stuffing as you go using the overcast stitch you used for the top piece.

Stop where marked on template and place “fin” piece between tail pieces and sew closed.
Bonus points if you just did air quotes when you read that.

Cut small slits into felt to make sewing and gathering with ribbon easier do not cut through any of your stitches.
Unless you are feeling too accomplished and wish to begin all over again.

Necessary but glaringly obvious instruction: Thread needle, pass ribbon through holes in felt piece.

Place stick inside and all the way up to provide structure for years of play. Pull ribbon to gather.

Tuck raw felt edge in. Use your hot glue to attach tucked in felt pieces to the dowel.
Work through the process a time or two before breaking out the scalding hot glue.
Knot to hold and wrap the ribbon around the base a few times before gluing down for a cleaner look.

Add ribbon down the length of the dowel gluing the entire way down.

Attach tail to the dowel the same way you did the seahorse head.

Use the remaining tulle to create a top fin by tying in a knot around the dowel.
This fin has no name since it does not actually exist but you cannot ride on seahorses so lets not get too bogged down in reality shall we?
Hot glue to hold.

To make the detachable felt kelp bridle:
Sew the sequined shell front to the loop shell back with an overcast stitch and white thread.

Sandwich one end of the kelp in between the front and back of the felt shell pieces before sewing closed.

Check to make sure the bridle isn’t twisted before attaching second shell end.


Stop by the shop:

Templates
Look at that! I’ve put all the templates into a handy PDF for you:
Seahorse-templates
Happy Crafting!
Andie Clark
More felt summer crafting awesomeness:


OMG how cute is that????
Very cute.
Oooh, this is so adorable!!! Too cute!!
Thank you so much for this project.2 little girls are going to be very happy with their own seahorse……
Send pics!! I’d love to see the finished product!
Reblogged this on ~American Felt & Craft ~ Blog.