DIY Fireflies are literally the first thing I wanted to make when we stocked our glow felt last fall. This adorable firefly garland is the perfect addition to a baby or child’s room. The glow in the dark felt creates a smooth and gentle glow without wires or batteries.
You will need: (for 8 fireflies and stars from scraps
2 sheets of glow in the dark felt
1- 9″ x 12″ sheet of a dark brown felt I used Saddle Brown
1- 9″ x 12″ sheet of white felt but I think a pale pink like Paris Pink or blue like Sparrow would look great too.
3 yards of twine or any thicker string, I like the rustic natural look of twine
Felt Glue
Sequins (optional) I used Snow White
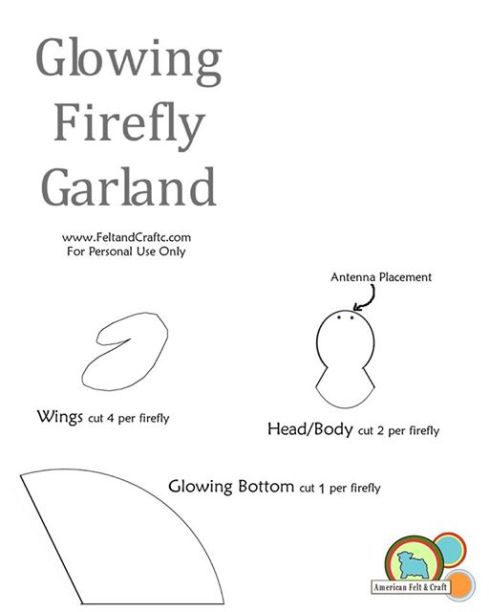
Firefly template, see bottom of post.
 Begin by folding the one of the abdomen pieces in half and stitching along the long side. Because ALL of the fibers used in glow felt glow it doesn’t matter which side of it you use.
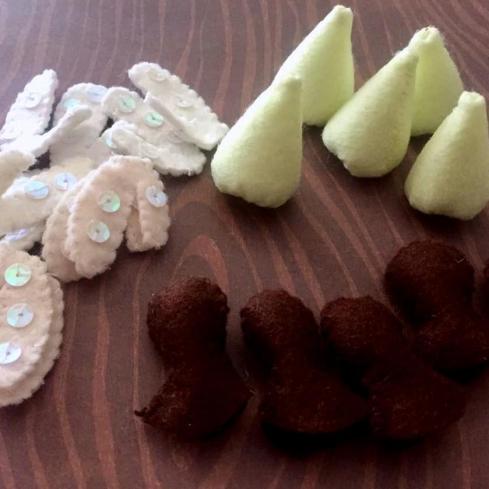
Run a small gathering stitch along the open top and stuff. Pull closed and run your needle through the gathered end a few times to even it out. Set aside and repeat with remaining 7 glowing felt bottoms. Save the scraps you will use these to create glowing felt stars. For pointers on sewing see Stitches.
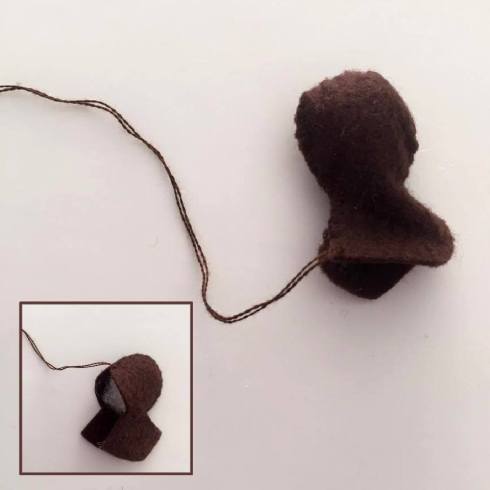
Place two of the felt body pieces together and overcast stitch around the edges. Stuff the rounded head part and sew all but the bottom. Repeat 7 more times and set aside.
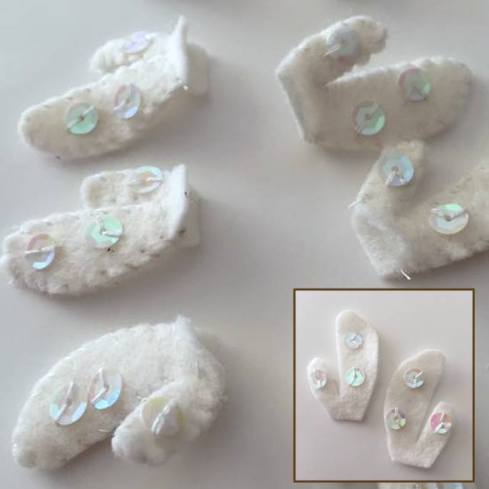
If you want to add sequins to your felt wings for some daytime sparkle consider adding sequins, I added them to both sides of the wing but honestly the bottom ones don’t really show so cut your work in half and consider skipping one side of the wings. To add sequins sew onto one or both sides of the wings and overcast stitch the two together. Repeat with 15 remaining felt wings (they are tiny they go pretty fast.) And set aside. For tips on sewing sequins to felt see THIS POST.
Now the real D.I. Y crafting action begins. To complete this felt craft place the body piece over the pointed end of one of the abdomen pieces. As shown.
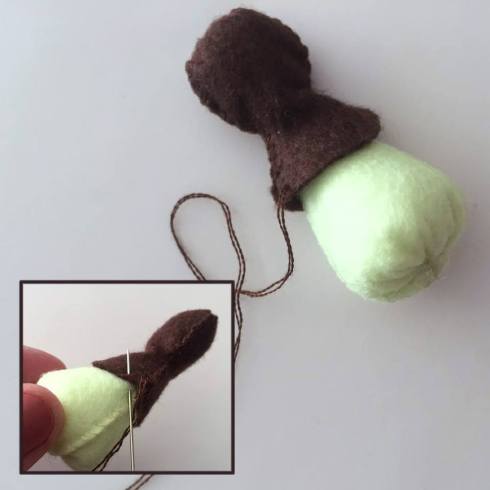
Stitch the body to the base.
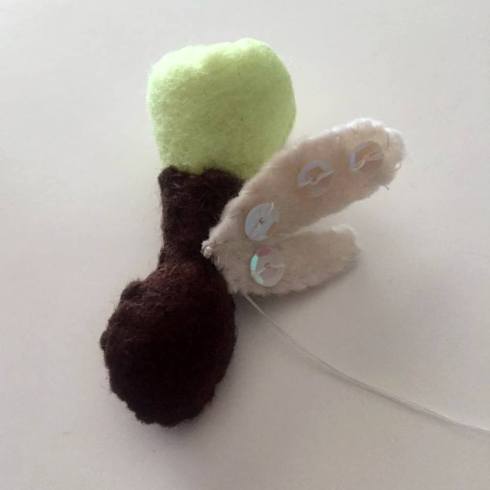 Place felt wings where you want them and stitch down one at a time.
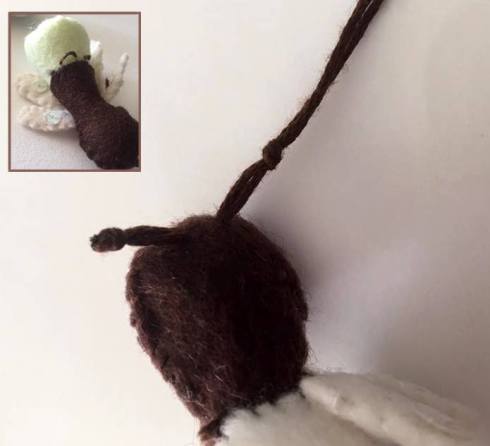
Create antenna by knotting doubled over cross stitching thread and pulling through at the front of the head where marked.
Using the same technique create a loop on the body of the fireflies, because of their weight you will need to remember to keep the loops on the underside because the DIY fireflies will flip. If you are tired of sewing you can also hot glue them onto the twine I promise I won’t tell.
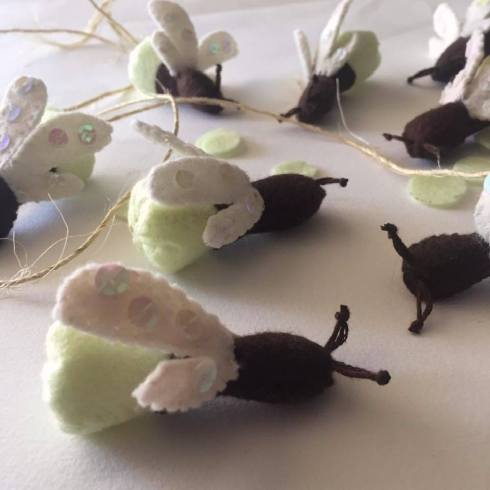
Assemble the DIY felt firefly garland.

Create a loop in one end to hang the garland.
Cut round star pieces from scraps of glow felt. You will need two of each size star to sandwich between the twine. I got 13 pairs from my felt scraps.
 Cut as many felt circles as you can.
There is no template because you will need to use scraps for this so the sizing will vary.
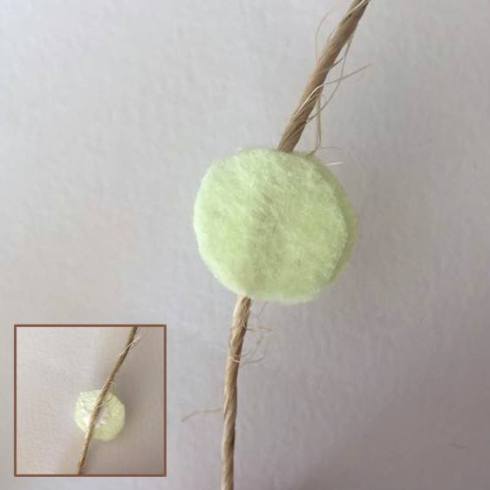
String the fireflies and glue stars to the twine with felt glue to keep them from sliding too far one way or another.
Print Template at full size.
 Happy Crafting!
Andie
Stop by the shop:

Tags: american felt and craft, craft, DIY, felt, fireflies, firefly template, firefly tutorial, garland, glow felt, how, project, summer craft, tutorials

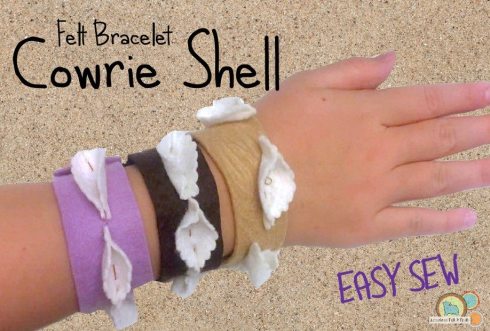

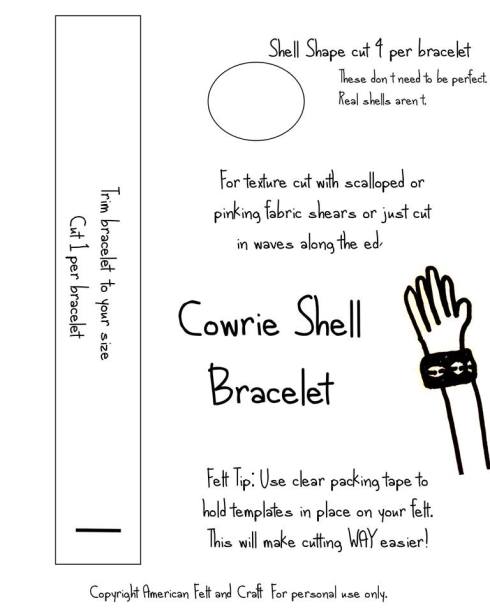
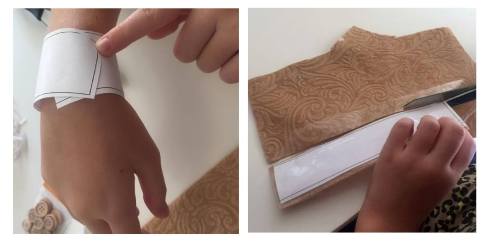 Loosely cut around the bracelet template and try on to get it close to the right size. It will need to overlap so the button works.
 Mark where the button should go and sew down with criss crossing stitches.
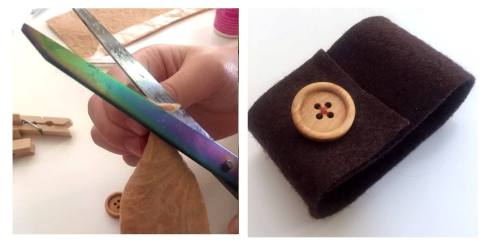 Mark the correct spot for the button-hole and carefully fold over the felt and cut. Cut less than you need to, you can always make it bigger.
 Lay down the shell shapes and sew along the middles with a simple running stitch.
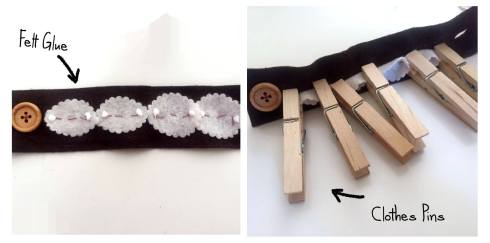 To make the shells curl place small dots of felt glue fold over and clip clothes pins to hold them until dry…about 15 minutes. Then remove the clips and rock those babies!


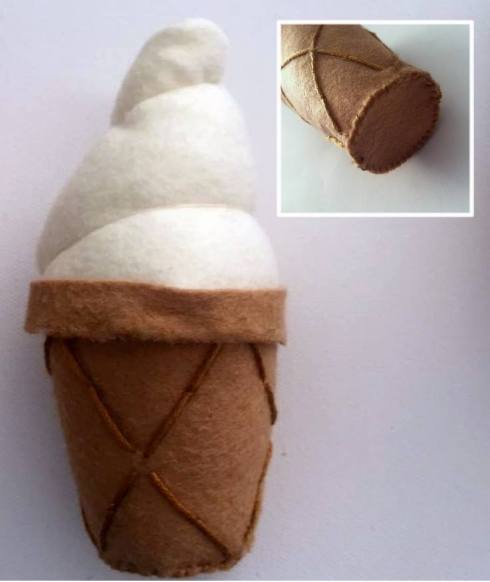
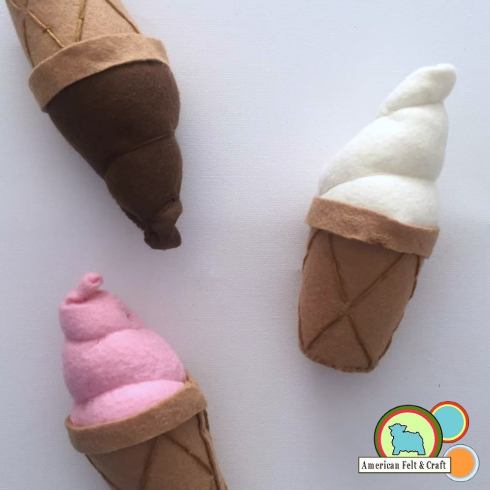
 Summer is here and it’s the perfect time to set up a living room ice cream shop. Fill your felt freezer with these adorable and super soft felt ice cream cones. Our felt tutorial will walk you step by step through the entire process.
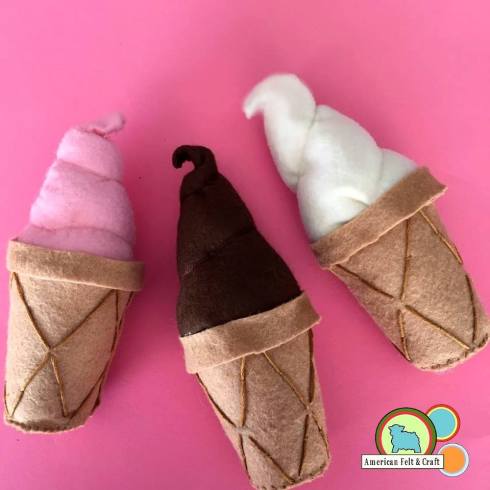
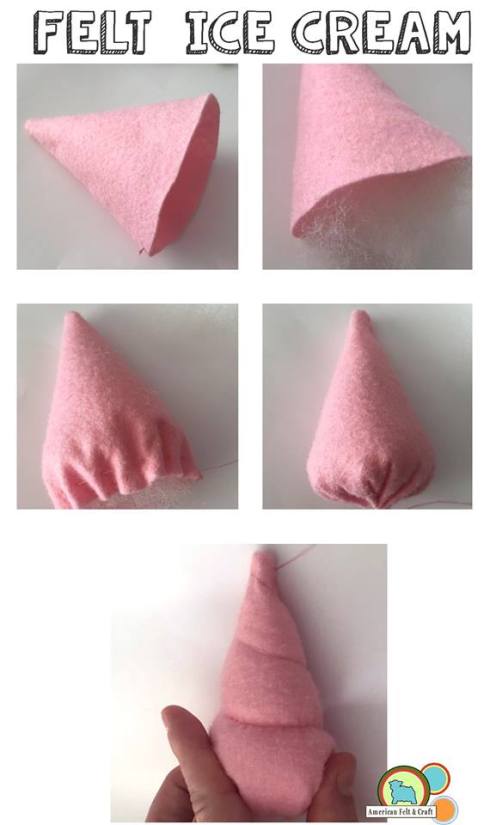
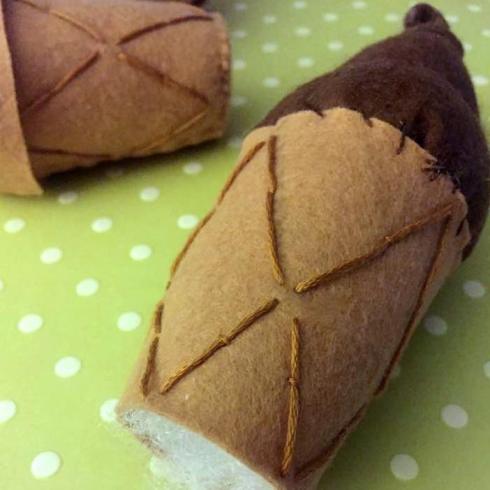
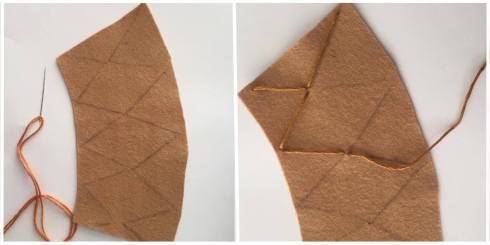 Cut out cone base from light brown felt, lightly trace the triangle shapes with pencil. Stitch along pencil marks with long stitches and a full strand of cross stitching thread doubled over.
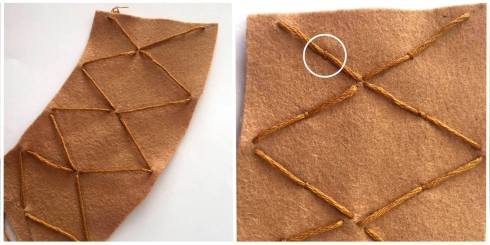 Go back over long stitches with short stitches into the centers to hold the thread down. As shown. These are tacking stitches.